
Knowing how to securely move your assets is a fundamental skill for any cryptocurrency trader. Whether you’re looking to transfer earnings to a personal wallet for safekeeping or send funds to another Tapbit user instantly, this guide provides a clear roadmap for the entire withdrawal process.
On-Chain Withdrawal Process
For users looking to transfer assets directly to an external wallet, Tapbit supports on-chain withdrawals across multiple blockchain networks. Follow these steps to complete your withdrawal
STEP 1: Preparation & Access
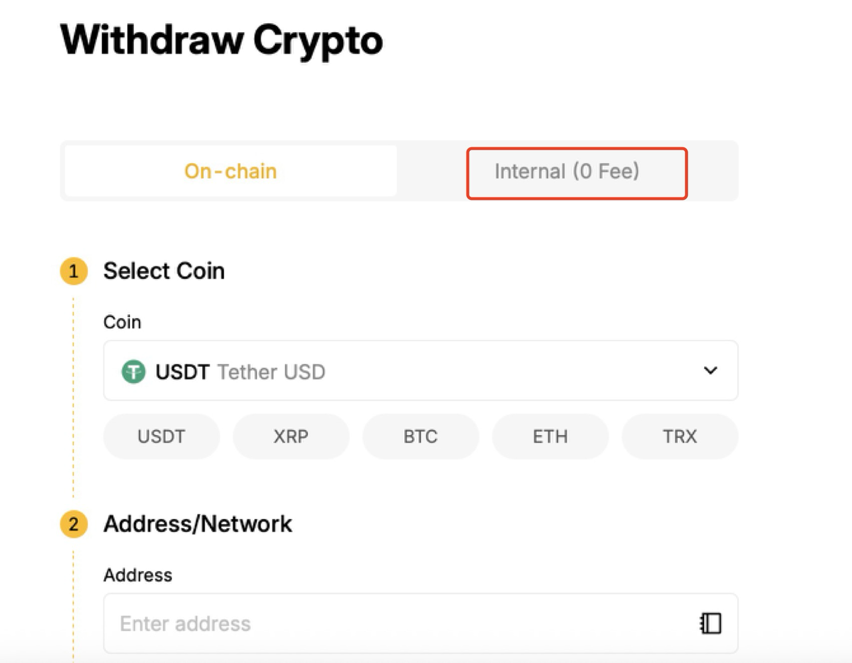
To initiate an on-chain withdrawal from your Tapbit account, begin by logging in and navigating to the ‘Assets‘ section, where you will select the ‘Withdraw‘ option to start the process. And in the Withdraw part, choose the ‘On-chain‘ tab.
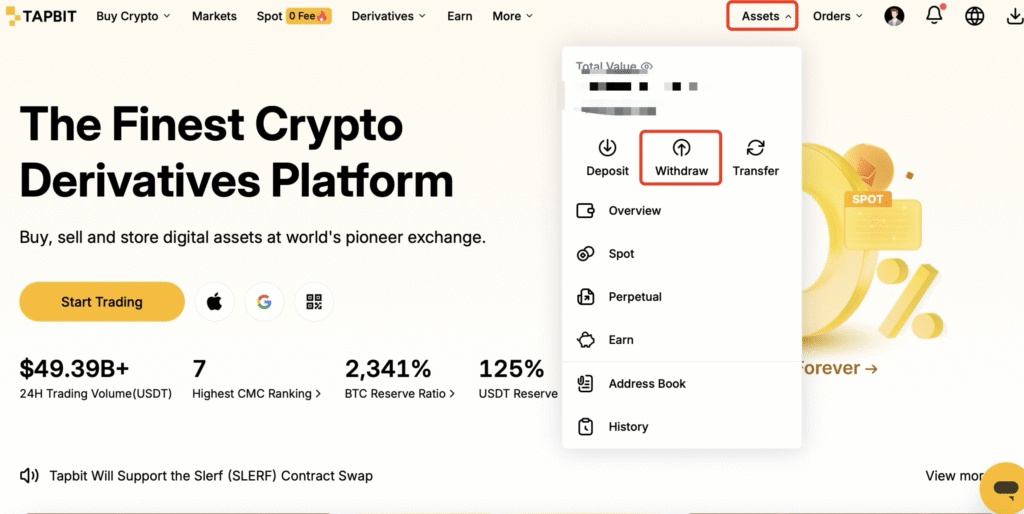

Please note that for enhanced account security, you must complete both your PIN setup and Two-Factor Authentication (2FA) before being permitted to withdraw funds. You can refer to the article on how to set Two-Factor Authentication for help.
STEP 2: Transaction Configuration
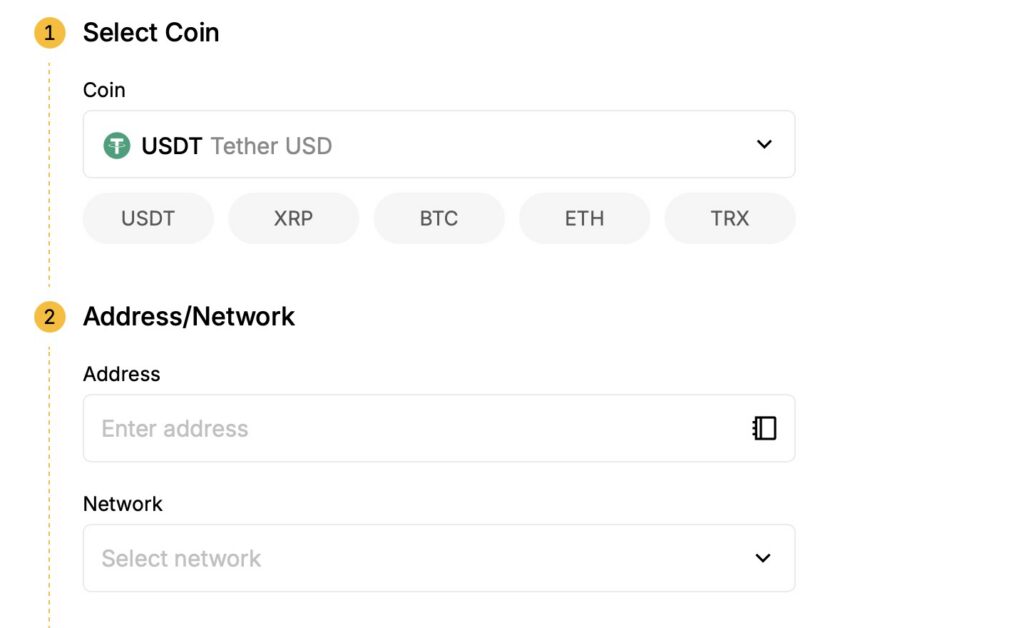
Once you access the withdrawal interface, you will need to configure your transaction details. First, select the specific cryptocurrency you wish to withdraw. Then, choose the blockchain network that is compatible with your receiving wallet. You must obtain your Web3 wallet address by accessing the ‘Receive’ function within your external wallet, then carefully copy and paste this address into the designated field on Tapbit’s platform
STEP 4: Amount Specification & Confirmation
Enter the precise amount you intend to withdraw, remembering to account for network gas fees by allocating a slightly higher amount than your target withdrawal. Before finalizing, thoroughly review all transaction details including the fees and the final amount you will receive.
Please be aware that gas fees represent transaction processing costs on the blockchain network itself and are determined by current network conditions, not by Tapbit. Transaction completion times may vary significantly based on the congestion and processing speed of the chosen blockchain network. Always verify that the network you select on Tapbit is compatible with your receiving wallet, and double-check all addresses before confirming your transaction, as blockchain transactions are irreversible once submitted.
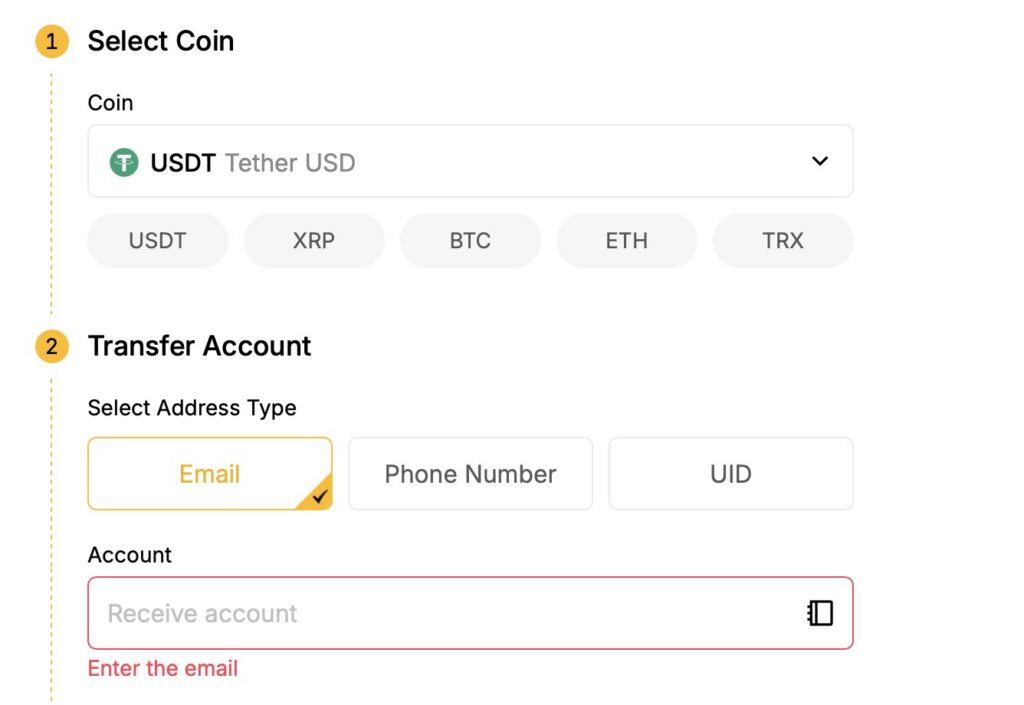
Internal Withdrawal
For transfers between Tapbit accounts, follow this streamlined internal withdrawal procedure.
STEP 1: Access Internal Transfer
Navigate to the withdrawal section and select the “Internal” transfer tab to begin the process.
STEP 2: Select Asset & Recipient
Choose the cryptocurrency you wish to transfer, then enter the recipient’s Tapbit account information using either their registered email address, phone number, or unique UID.
Step 3: Confirm Transfer Details
Enter the exact amount you want to transfer, review all transaction information carefully, and click “Confirm.” Complete any required security verification steps to finalize the transfer.

Please note that internal transfers between Tapbit accounts are processed instantly and involve no transaction fees, making this the fastest and most cost-effective way to move assets within the Tapbit ecosystem. Always verify the recipient’s information before confirming your transfer.
Sum Up
By following the steps outlined in this guide, you are now equipped to execute both on-chain and internal withdrawals on Tapbit confidently. Mastering these processes is key to taking full control of your digital assets, allowing you to move your funds securely and efficiently according to your needs.
Before finalizing any transaction, always remember to double-check the recipient’s address for on-chain transfers and the recipient’s information for internal transfers. If you encounter any issues or have further questions, our dedicated customer support team is always ready to assist you.